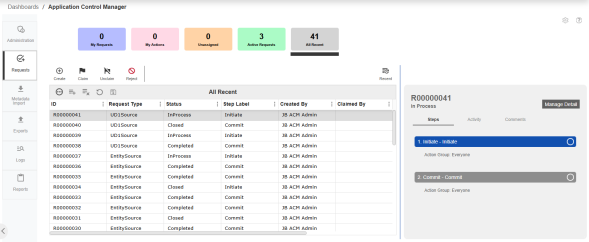
Any user with access to create a request will go to the Requests Home Page to start the process. Administrators grant access from the Settings page. A user that needs to approve or enrich a request will also go to this page for processing. This page is accessible from the left navigation panel on the left-hand side of the application.
Request Grid
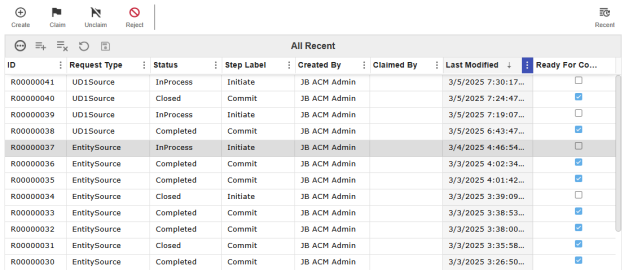
The request grid featured on the Requests Home Page displays summarized information about the request. To view the line item details, select a request and click the Manage Detail button on the Request Detail panel.
-
ID: System generated identification number for the request
-
Request Type: Show the Request Profile descriptions
-
Status: The current status of the request. Available statuses are:
-
InProcess: Applies to request that has been initiated or claimed.
-
Waiting: Submitted by prior step and is now pending next step action.
-
Closed: Closed without being committed. Usually it is either rejected or closed by system.
-
Completed: Ran through the commit step.
-
FailedCommit: Ran through the commit step but there are line items that failed.
-
AwaitingApproval: This status will only appear if additional approvers are added to the request using the Modify Approvers feature. Refer to Use Modify Approvers for more information.
-
-
Step Label: Description of the step as set in the Request Profile.
-
Created By: Name of the user who created the request.
-
Claimed By: Name of the user who claimed the request. The default value for this is Unclaimed.
-
Last Modified Date: Time stamp indicating the last modification date and time.
-
Ready for Commit: Indicates if the request is ready to be committed. When a request reaches the Commit step, this column will automatically be set to True. Administrators can un-select the check box in the grid to set it to False.
Request Detail Panel
When you select a request from the Request Grid, the detail panel for that request will populate to the right of the grid. This panel shows the request number and status of your selected request, a breakdown of each step of the request, the latest activity of the request, and any comments related to the request.
Depending on the request selected, the button in the top-right corner of the panel will say either View Details or Manage Details:
-
View Details: You can view the details of a submitted request, a completed or closed request, or a request in the Commit step.
-
Manage Details: You can manage request details to edit a request that you have started but not yet submitted, or when you belong to the action group assigned to the Process step.
Steps
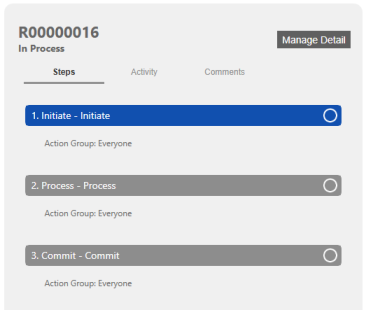
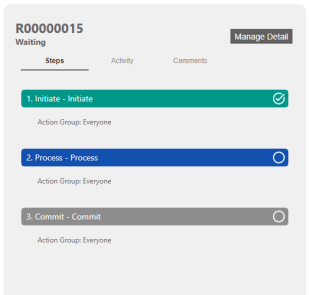
The first tab on the Request Detail Panel shows each step of the request process that your selected request will travel through as defined in your Request Profile. Completed steps will appear green with a checkmark, steps that are currently in process will appear blue without a checkmark, and steps that have not yet been started will remain greyed out. If there are many steps in your selected request’s process, the pane will scroll to show all upcoming steps.
In the example below, you can see that the Initiate step has been completed while the request is currently in the Process step. The remaining steps will stay greyed out until the request has progressed.
The Steps tab will also indicate which Action Group is assigned to each step, as determined by the Request Profile.
As the request moves throughout the process, the Steps tab will update accordingly. When a request is pushed back to a previous step, the formerly completed step (indicated by a green banner and checkmark) will revert to the blue banner, showing that the step is in process.
Request Activity
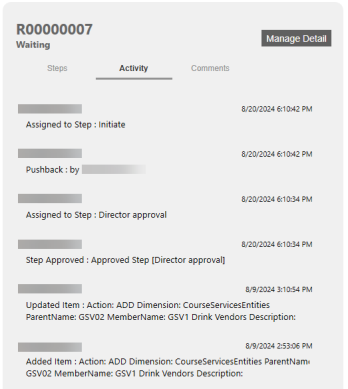
The Request Activity tab will display all activities associated with the selected request, with the most recent activity at the top. Each entry will log a description of the activity, a timestamp of when it was performed, and the username of the user performing the action.
Comments
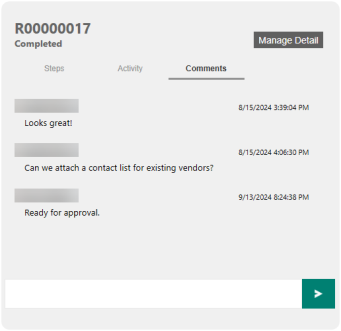
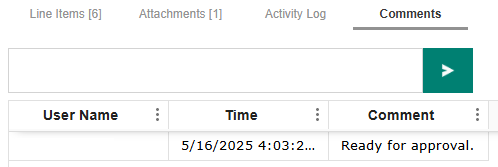
The final tab on the detail panel displays any comments made during the request process. This pane displays the Username, timestamp, and content of each comment made with the most recent entry shown at the bottom of the comments log.
When on the Comments tab, an entry box will populate at the bottom of the log to allow for new comments to be added directly from the Request Home Page. Comments should not exceed 250 characters.
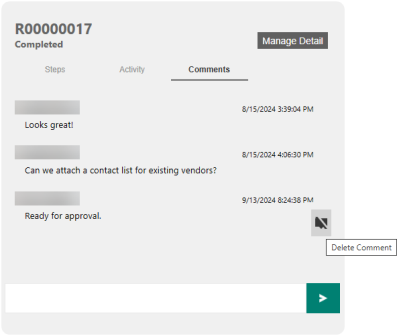
When a request is still active, you can delete any comments that you have created yourself. After a request is completed or closed, comments can no longer be deleted for auditing purposes.
Commit
Once you are satisfied with your request and ready to move it to the next step in the process, use the Commit button to apply the request changes to your Dimension Library.
Request Filters
Use the request filters to quickly refresh the Master Request grid and display the relevant requests. There is an option for you to input how many days of requests to show in the grid.

-
My Requests: Shows requests the current user has created.
-
My Actions: Shows requests with pending actions for the current user.
-
Unassigned: Shows requests that are not claimed by any user.
-
Active Requests: Shows requests that are currently active (not in a closed, completed, or committed status).
-
All Recent: Shows all requests in any state from recent days as configured in the next option.
-
 : This allows you to specify which recent requests are shown. You can specify any number of days, based on the request's last modified date, to be shown in the grid.
Request Toolbar

-
Create: Create a new request. This will redirect you to the Request Details Page.
-
Claim: Clicking on this icon will update the Claimed By column with the name of the user who claimed it. A user cannot claim a request that was initiated by them.
-
Unclaim: Clicking on this icon will update the Claimed By column with Unclaimed. See the Request Filters section for more information.
-
Pushback or Reopen: Where applicable, this sends the request back to the previous step or reopens a request that has been closed but never submitted.
-
Reject: Reject and close out the request. A comment window will display. A comment is optional to close the request.
-
Commit: Use this to commit your request and apply the changes to your application.
Request Details Page
Requests can be created and managed from the Request Detail page. Below are the activities that a user can perform on this page:
-
Add or delete items in the request. A request can contain multiple line items.
-
Move a request forward or backward in the request flow
-
Reject a request
-
Attach, delete, and download documents
-
Add comments to the request
-
View the Activity Log
Select a Request Profile
When creating a new request, the first step is to select your Request Profile. From the Request Home Page, click New to begin a new request, and you will be redirected to select your profile. Use the drop-down menu to select your request profile. Only enabled profiles that you have access to will be shown on this drop-down. Choose the appropriate request profile and click Save to begin your request. Once saved, the profile will become locked to prevent any mistaken profile changes during the request process.
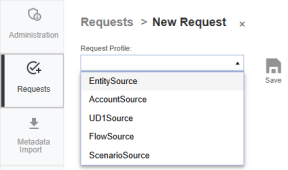
If you click out of the request detail page without saving your request profile selection, no request will be made. Only after saving your request profile selection will the Request ID be generated.
Request-Level Detail Page
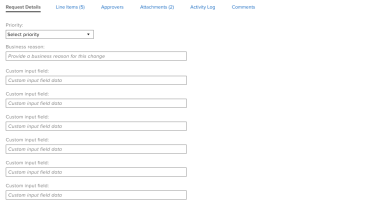
This page will only appear if there are additional properties set in the Layout for the selected Request Profile. Properties that are shown in this section apply to the entire request. Some common properties used are Priority of the Request, or Business Justification for the request.
Request-Level detail properties can be entered on the Initiate step of a request. Once the request has progressed beyond this step, you will only be able to view these properties.
Navigation Tree
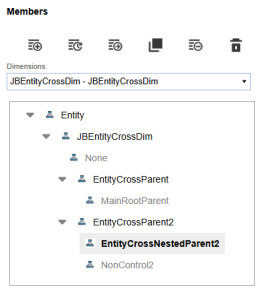
The navigation tree displays dimension members in a hierarchy to make creating a metadata request more efficient. You can click on a member in the navigation tree and then select the action you wish to take for that member.
Metadata Hierarchy
When submitting a Metadata request, the navigation tree will display the available members according to the member filters set for the dimensions in the Request Profile. From the tree view, you can easily see the parent and child relationships, especially for extensible dimensions.
Dimension Selection
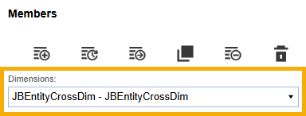
The dimensions shown on the navigation tree are based on those set in your Request Profile. A Request Profile can have multiple assigned dimensions. Use the dimension selection drop-down to display the member hierarchy you wish to view in the tree navigation.
Filter Member
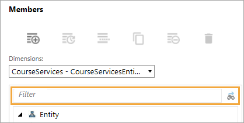
When you begin typing in the navigation tree filter box, the result box will show all members that contain the member's name, as well as their parent path. This is particularly useful in preventing you from entering parent-member relationships outside of the member filter.
Extended Member Types
Extended member types will appear gray in the tree navigation. For example, an Entity member that is extended from another Entity dimension or an Account hierarchy that is inherited from the parent dimension will both display gray. This is consistent with the way the Dimension Library displays a hierarchy.
Certain actions cannot be performed on an extended member type. For example, you cannot update member properties of an Account that is inherited. To update the member properties, you must select the dimension that the account originated from.
User Navigation Tree
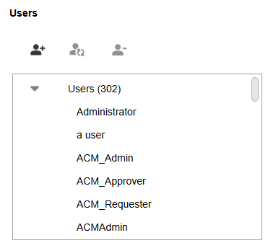
A list of all existing users in the application will be displayed in the navigation tree when the selected Request Profile is a User Security type. The total number of users is shown in parentheses at the top of the list.
This list includes all users, regardless of whether their Is Enabled property is set to True or False. This is so that an update request can be submitted to change the enabled settings of a user.
The Filter box above the navigation tree allows you to search for a user using their full name or part of the user’s name.
Metadata Request Actions
Request actions refer to the changes you can make to a member in a dimension. Application Control Manager provides six options that can be activated in Request Profiles.
Administrators can select to turn on one or all actions in any given Request Profile. The action buttons on the Request Detail page are enabled based on the Request Profile configuration.
Add

Use this to add a new member to the hierarchy. After clicking the Create New Member button, you will be directed to the Add Member page. Here you should see all properties that are assigned to your request layout.
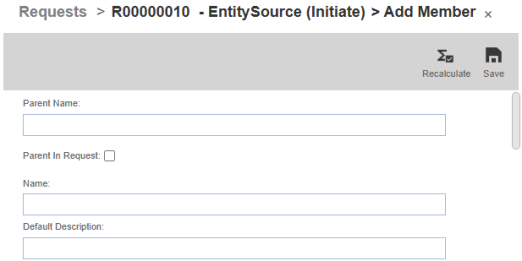
CAUTION: If a member is selected from the navigation tree and then Add is clicked, the selected member will automatically be assigned as the Parent on the Add Member page.
Update
Use this option to update a member’s name, properties, or relationship properties. You must select a member from the navigation tree for the button to become clickable. When you click on the Update button, you will be redirected to the Update Member page. Here you should see all properties that are assigned to your request layout.
Move

This function allows you to move a member from the current parent to another parent.
You must select a member from the navigation tree for the Move button to become clickable.
After you click the Move button, the Move Member dialog box will appear with the selected member name and description at the top of the box, along with the current parent of your selected member.
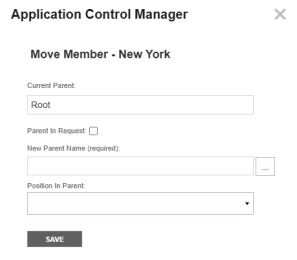
The Position in Parent setting can also be used to specify the position of the member within your dimension hierarchy. If Before Sibling Member or After Sibling Member are selected, an additional field will populate allowing you to select the sibling member that should come before or go after your copied member.
Copy
The Copy function allows you to make an exact duplicate of an existing member, including the member's name and all properties, and place it in more than one hierarchy. When copying a member, you will specify the new parent for this copied member.
First, select a member from the navigation tree and then the Copy button will become clickable. After you click the Copy button, the Copy Member dialog box will appear.
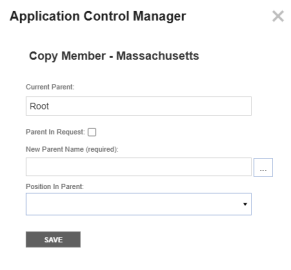
You can use the Position in Parent setting to change the current level of the member in the hierarchy in relation to its siblings. This setting cannot move a member out of the current hierarchy. If Before Sibling Member or After Sibling Member are selected, an additional field will populate allowing you to select the sibling member that should come before or go after your copied member.
Remove
This button Removes the current parent relationship of the selected member without deleting the member itself. You must first select a member from the navigation tree to make the Remove button clickable. If the member is no longer part of the dimension structure, it will be placed under Orphans. This option will not delete the member.
Delete
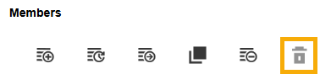
Select this to delete the selected member from the Dimension Library. A member can only be deleted if it does not have data stored. If the delete action is enabled in the request profile, the button will become clickable only after you have selected a member from the navigation tree.
NOTE: If there is underlying data associated with the member you are trying to delete, an error message will show in the request for that member after the Commit step.
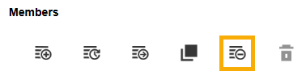
User Security Request Actions
There are three available actions in the application to manage a user. In a Security type Request Profile, the administrator can select one or all three actions to control the types of change requests that can be submitted.
Add
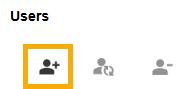
This button is used to add a new user to the application. Above the navigation tree on the Request Details page, there is an Add New User button. Clicking this button will take you to the Create User page where you should see all properties assigned to the request layout.
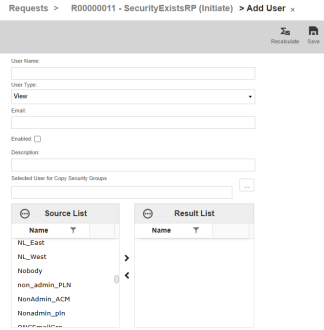
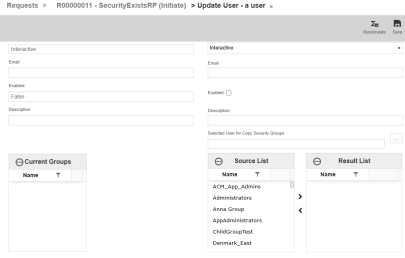
Above the User Groups box is the Selected User for Copy Security Groups property. This property allows you to mimic an existing user’s group memberships to the new user you are creating.
Update

This is used to update a user’s security profile settings, such as Email or Group Membership. This action can also update a user’s Is Enabled property.
Start by selecting a user from the navigation tree, then click on the Update button. You will be taken to the Update User page where you should see all properties assigned to the request profile.
Remove
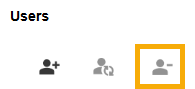
Use this button to remove a user’s access to the application. This is done by setting the Is Enabled property in the user security settings from True to False.
To reactivate a user’s access, use the Update action to turn the Is Enabled property back to True. This action does not delete the user from the system database.
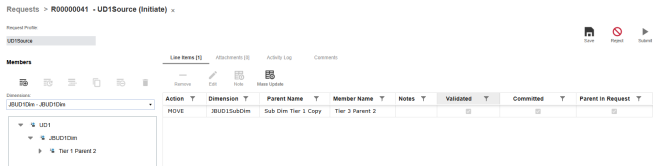
Item Detail Grid

Line items within the request represent the actions or updates you wish to be reflected in your application once the request is committed.
Where applicable, you can add multiple line items, or action types, within the same request. For example, you may have five new accounts and a couple of Move member changes within the same request.
The grid displayed on this page will depend on the type of request.
For Metadata requests, the grid will show the Action, Dimension, Parent Name, Member Name, Notes, Validated, Committed, and Parent In Request columns.
For Security requests, the columns displayed will be Action, User Name, Notes, and Validated.
With this grid, you can remove or edit line items as well as access the Mass Update function. For more information on using this feature, see Mass Update.
The Remove and Edit buttons will only become available once you have selected an item in the grid.
Edit Item Details
To edit a line item, select the item you wish to make changes to, and the Edit button will become available. Click Edit and you will be redirected to the Item Detail page. You cannot edit a Remove or Delete action, as there is no layout to be displayed. You can only add or remove a Remove or Delete action line item.
Item Notes
To add small notes or commentary to your line items, select the item and the Note button will become available. Click Note and a dialog box will appear allowing you to enter your note into the text box. Click Ok and the note will be displayed on the Item Detail Grid under the Notes column.
Mass Update
The mass update feature enables you to enter multiple metadata or security items within a single request using the OneStream spreadsheet, rather than entering each change individually on the Request Details page. This provides you with multiple methods of adding and editing your request line-items, which can be particularly useful when many changes may need to be made at one time.
 Watch to see how to use this feature (1:42).

Spreadsheet Generation
When you click the Mass Update button on the Request Details page, a spreadsheet will be dynamically generated and open within the OneStream application.
Temporary Spreadsheet
The temporary spreadsheet that populates is generated based on the line items in the request. One temporary file will be generated for each user when they open the Mass Update spreadsheet. This file can be found in the OneStream file explorer under Documents within the user's folder.
NOTE: Since the file created is temporary, any formatting or additional tabs created on the spreadsheet will not be retained the next time the Mass Update spreadsheet is opened for the same request. To maintain formatting and use the spreadsheet for future requests, save the spreadsheet to your local device.
Line Items Tab
One tab will generate titled Line Items. This tab is required and should not be deleted or renamed.
Headers Row
The first header row, which is automatically generated, contains the properties that are assigned in the layouts for the request profile. Some fixed headers or properties appear in every spreadsheet. These properties do not need to be created or added to the layouts, they are generated automatically.
For Metadata request types, there are nine fixed headers:
-
Dimension: Drop-down list of dimension(s) that are assigned in the request profile
-
Action: Drop-down list of allowable actions in the request profile
-
Current Parent Name: All actions except for adding a member require the current parent's name for the member
-
Current Member Name: All actions except for adding a member require the current member's name
-
Parent In Request: Indicate whether the parent for the member is being created within the current request
-
Parent Name: The new parent name when adding, copying, or moving a member
-
Position In Parent (optional): To specify where the member should be positioned in the hierarchy
NOTE: The Position In Parent options are: Before Sibling, After Sibling, First Sibling, Last Sibling, Retain Current Position.
-
Sibling Member: If the Position In Parent is set to either Before Sibling Member or After Sibling Member, enter the sibling member name here
-
ItemID (last column): This hidden column is for system use only. Do not populate or paste any values here.
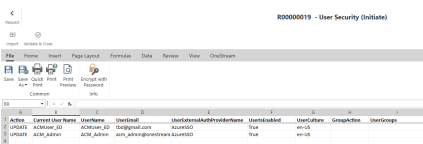
For user security requests types, there are three fixed headers:
- Action: Drop-down menu of allowable actions in the request profile
- Current User Name: Specify the user that you would like to take action on
-
ItemID (last column): This hidden column is for system use only. Do not populate or paste
Group Action
The Group Action column in Mass Update is for updating an existing user's group memberships. It is automatically generated when the User Group property is assigned to the layout.
You can use the Add Group or Remove Group options to specify the group you want to modify for that user while leaving other assigned groups unchanged.
IMPORTANT: It's recommended you have a dedicated layout with just the UserName and UserGroup properties to manage group memberships. When other properties are in a layout, for example email, you must provide the current value in the spreadsheet, or the existing values will be overwritten.
Properties in the Spreadsheet
Any custom properties assigned in the layout will be generated in the spreadsheet. Combo box type properties will also be created as a drop-down cell with the same pick list.
Some properties that contain secondary pop-up dialog windows, which are available when using the Request Details page, are not available in the spreadsheet. For example:
-
Member or Parent selectors
-
Copy from User feature for security access groups
-
Varying member properties selector
Input Data
The main methods of entering data into a mass update spreadsheet include manual entry, copying and pasting data in the spreadsheet, or importing an outside Excel file.
With a range of Excel functionality available, additional tabs, formulas, formatting conventions, or filters can be used within the spreadsheet to better organize the incoming metadata. However, as a new spreadsheet is populated each time the mass update button is clicked, any additional features or formatting will not be saved. To save any formatting that has been added, use the Save As button to save the spreadsheet onto your local device. This formatted file can be imported for use in future mass updates.
Manual Entry
You can input data directly into the Mass Update spreadsheet by clicking into a cell. Once an action is selected from the Actions column, some cells will change to gray indicating that input is not necessary. For example, if Add is selected, the Current Parent Name and Current Member Name fields are not required.
Copy and Paste Data
Mirroring Excel functionality, you can also edit the mass update spreadsheet by copying and pasting information from an outside Excel file or drag down data from one row to the next.
NOTE: Remember not to copy and paste the ItemID column, which is a hidden row located at the last column in the spreadsheet. This is row is for system use only.
Import Excel File
Excel files saved from past request spreadsheets, or those generated outside of the OneStream application, can be imported using the Import button within the Mass Update spreadsheet.
NOTE: Files cannot be imported from previous versions of Application Control Manager.
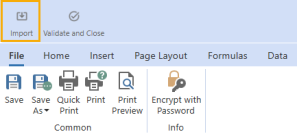
Excel files selected for import must feature one sheet titled Line Items. If this tab is not present or if it is not named Line Items, a dialog box will populate informing you that this tab must be present for import to succeed. The headers must also be an exact match to the headers generated by the Mass Update spreadsheet, including the fixed headers.
NOTE: If you attempt to import a file while there are existing rows within your request, a dialog box will prompt you to either Replace or Append the existing records.
Enter Varying Member Properties in Mass Update
When using the Mass Update spreadsheet to enter changes for varying member properties, ensure that each varying item has a row in the spreadsheet. See Import Shared Members and Varying Properties for more information.

If varying member properties are included in the layouts, all layouts for each step must have the same properties. For example, if Text1 is in the layout for the Initiate step, then Text1 should also be included in the Process step layout.
-
For non-varying member properties, required fields must be in the first row from the group of rows that combine into one line item when saved to your items grid.
-
For varying member properties, required fields must be in at least one row from the group of rows that combine into one line item when saved to your items grid.
When using Mass Update to make an update to any varying member properties, include all the existing values in the spreadsheet. If any existing varying member property contains data and is excluded or left blank in the spreadsheet, Application Control Manager will assume it is intentional and will remove the existing value.
Watch to see how (3:36).
For example, if Text1 currently contains value "123" in Scenario Type, Actual, and Time Value 2024M1 and you would like to add to it a value "456" in Scenario Type, Actual, and Time Value 2024M2, then both the existing "123" and the updated value of "456" should be included in the Mass Update spreadsheet.
TIP: To quickly pull all existing varying member properties for a member, first add a line item on the standard input page and then open that line item using Mass Update. You should see all varying members data listed in individual rows on the spreadsheet.
Validations
After data has been entered or imported into the spreadsheet, click the Validate and Close button to prompt the application to process each row and identify any existing errors. After this process is complete, a dialog box will appear to let you know the status of the validation check.
TIP: Several factors may impact the application performance during the validation process such as number of records in the spreadsheet or number of properties in the layout. Reduce the data volumes if the system slows down.
If there are no errors, a dialog will confirm the successful validation of the spreadsheet. If the spreadsheet does not pass the validation check, a list of action items will display what must be corrected.
NOTE: Failed validations will not show in the activity log.
The following are the validations each spreadsheet must pass:
-
Action items must be provided for each row and cannot be left blank. Action items must be listed in all uppercase.
-
Dimension Name must exist in the selected request profile and cannot be left blank.
-
Parent In Request must either be left blank or set to True or False. This property is used to indicate whether the Parent for a particular member is being created within the current request. If there is a pre-existing Parent within the application, and it is not being modified within the request, this column should be set to False.
-
When Parent In Request is set to True, ensure the new parent exists in the ParentName row within the spreadsheet, or that the parent name exists in the line item table on the Request Details page.
-
-
Each row must have a unique combination of data in the properties. Duplicate rows will produce a validation failure.
-
Any validations assigned in the layout used for the selected request must be met within the spreadsheet.
-
All required fields must be filled out.
-
All actions except for Add require that Current Parent Name, New Parent Name, Member Name, or ParentName/SelectParentMember be filled out. If one of these fields is missing and is required to perform a selected action, the spreadsheet will not pass validation.
-
Columns featuring a drop-down list must be left blank or filled with a value acceptable within the parameters of the request. This is particularly important to note for imported data.
Once the validation check has been passed, click OK to return to the Request Details page where your rows will be reflected in the Items table.
Edit Individual Items
Line items added using the Mass Update spreadsheet can still be added, edited, or removed individually, offering users multiple avenues of item entry and management. As the two sync together to maintain line-item changes within the request, any changes made using the item details layout will be reflected in the associated spreadsheet, and any changes made using the spreadsheet will be reflected in the details page.
Approvers
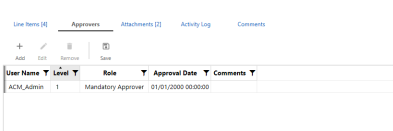
The Approvers page will appear only when the Approver option in the request profile is set to True. Enabling this feature will bypass the security action group specified in the steps. See Use Modify Approvers for more information.
Opening the page will lead you to a grid showing the User Name, Level, and Role of the assigned approvers, as well as columns displaying the Approval Date and any Comments.
To add a new approver, click the New button and a dialog box will appear allowing you to enter in the details for your approver. All fields except for Approval Date are editable. After you click Save, a new line will appear on your grid with the details of your new approver.
If you need to edit the details for an approver, first select the row of the approver you want to change and then click Edit. Again, a dialog box will appear, showing all the current details of your approver. After making your changes, click Save and you will see any edits reflected in the Approvers grid.
The Remove button will only become available after selecting a row in the Approvers grid. Using this button will remove the entire selected row.
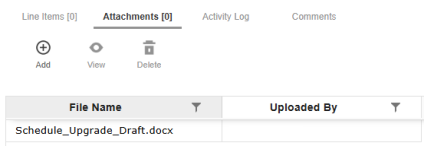
Attachments
Using the Attachments page you can add, delete, and view all supporting documents as part of the change request process. The most commonly used file types are supported (xls, doc, pdf, png, zip). You cannot attach an xml file type to a request.
When you first open the page, you will see a grid displaying the name of your attached file and the user who attached it. When a new attachment is added, the tab will refresh with a total count of all attachments in the grid.
-
New: Upload a new attachment file from your computer. You cannot attach an xml file.
-
View: Open existing attachments to view only.
-
Delete: Remove an attachment.
NOTE: Delete is available prior to a request being completed and the attachment was added by the request reviewer.
Attachments can be viewed or added regardless of a user’s security level or the status of the request, however, they can only be deleted by the user who uploaded the file. To delete an attachment, the request status must be active (InProcess, Waiting, or AwaitingApproval). Attachments cannot be deleted once a request is Closed or Completed.
Activity Log
On the Activity Log page, you will find a grid detailing all actions performed within the request. This grid displays a summary of the action, the name of the user who performed it, and the time that it was performed. This grid is view only.
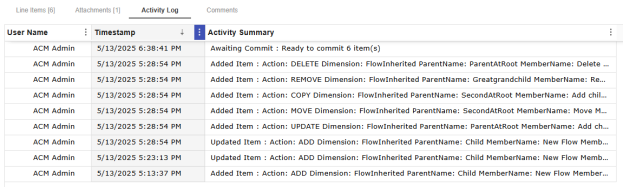
The same activity entries are also stored in the application Logs table.
Comments
In addition to leaving comments from the detail panel, comments can be added to your request by going to the Comments section of your Request. On this page you will see the comments grid which displays the User Name, Time, and Summary of each comment. Comments can be up to 250 characters.
You may only delete comments that were made by yourself and only when the request is not Closed or Completed.
Manage Request
From the Request page, there are a few different actions that can be taken to manage your request throughout the user-initiated process.
There are a few general rules built into the application, governing the integrity of the request:
-
You cannot approve or commit a request that you created even if you belong to the security group for that step.
-
This excludes OneStream Administrators who can manage any request at any time.
-
-
You cannot pushback a request that has already been committed, even when the status is FailedCommit.
-
Once a request has been committed, all associated artifacts such as line-item details, comments, or attachments can no longer be altered. This is to protect the request audit trail.
There is an option to provide comments, such as the reason for rejecting the request. Comments will be added to the request and the reject action will also be added to the activity log.
Reopen
The option to Reopen the request will become available when a request is in the Initiate or Process step and the request status is Closed.
NOTE: Requests in the Initiate step can only be reopened by the user who initiated the request.
Requests can be reopened from either the Request Detail page or the Request Home Page. After clicking Reopen, you will be re-directed to the Request Home Page where you should see your request status updated to InProcess.
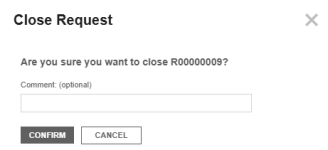
Reject
The option to Reject a request is available when a request is In Process or Awaiting Approval. After clicking Reject, a dialog box will appear asking if you would like to close the request. A text box is available if you would like to leave a comment in addition to closing the request.
Commit
Once you are satisfied with your request and ready to move it to the next step in the process, use the Commit button to apply the request changes to your Dimension Library.


